
You’ve probably heard of words like the diamond clarity chart and the diamond clarity scale while you’re looking for a diamond. These are critical factors in determining the quality and price of a diamond. Understanding these terms and how diamonds are graded for clarity can help you make an informed decision, whether you’re purchasing a diamond ring, engagement ring, or other fine jewellery. This diamond clarity and colour chart plays a crucial role in helping you assess the beauty and value of the stone.
In this blog, we’ll break down the diamond clarity scale, how diamonds are graded, and guide you through the diamond clarity chart.
What Is Diamond Clarity?
The existence of internal or external flaws, commonly referred to as inclusions and blemishes, is referred to as diamond clarity. The diamond’s overall brilliance and beauty may be impacted by these defects. The fewer inclusions and blemishes a diamond has, the higher its clarity rating will be.
Based on how noticeable these flaws are at 10x magnification, diamonds are categorized using the diamond clarity scale. The Gemological Institute of America (GIA) created this grading scheme, which is currently widely applied in the field.
The Diamond Clarity Scale Explained
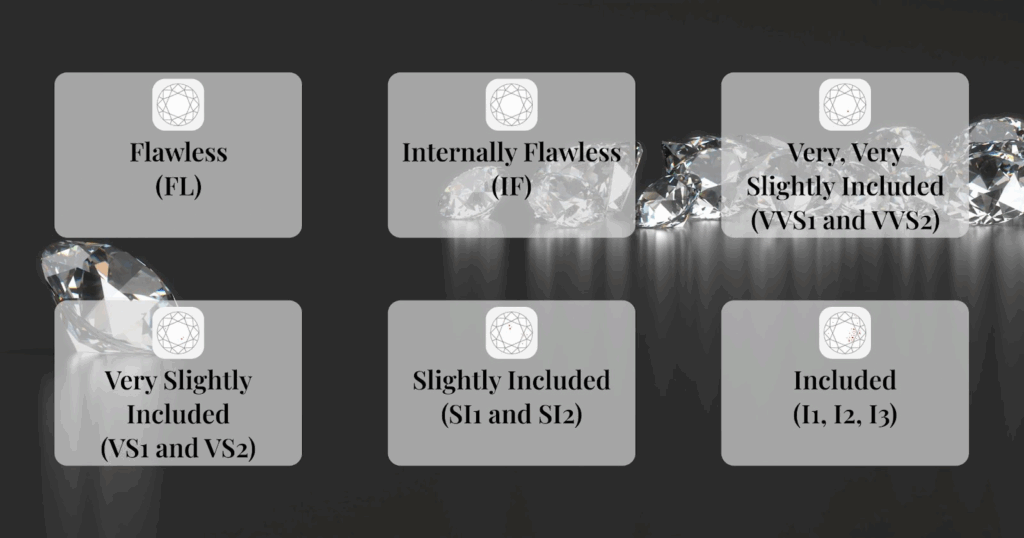
The diamond clarity scale ranges from Flawless (FL) to Included (I1, I2, I3), with various grades in between. The clarity of a diamond can greatly influence its price, with higher clarity diamonds being rarer and more valuable.
Here’s an overview of the most common clarity diamond chart:
- Flawless (FL)
- Description: A diamond with no internal or external imperfections visible under 10x magnification.
- Price Impact: Extremely rare and very expensive.
- Internally Flawless (IF)
- Description: A diamond with no internal flaws but possibly minor surface blemishes. These are often only detectable by a gemologist.
- Price Impact: Expensive, but slightly more affordable than FL diamonds.
- Very, Very Slightly Included (VVS1 and VVS2)
- Description: These diamonds have extremely small inclusions that are very difficult to detect, even under 10x magnification.
- Price Impact: High, but still less than FL or IF diamonds.
- Very Slightly Included (VS1 and VS2)
- Description: Diamonds with minor inclusions that can be seen under magnification but not with the naked eye.
- Price Impact: More affordable than VVS diamonds, but still considered excellent quality.
- Slightly Included (SI1 and SI2)
- Description: These diamonds have noticeable inclusions that can be seen with the naked eye in some cases. However, the overall appearance and brilliance of the diamond remain high.
- Price Impact: Relatively affordable compared to higher clarity diamonds.
- Included (I1, I2, I3)
- Description: These diamonds have significant inclusions visible to the naked eye, which may impact their overall brilliance and appearance.
- Price Impact: The most affordable, but also the least desirable in terms of visual appeal.
The Importance of Diamond Clarity in Your Purchase
While the diamond clarity chart provides a helpful guide, clarity alone doesn’t determine the beauty or overall value of a diamond. Diamond clarity and colour are both essential in evaluating the overall quality of a stone. In fact, the diamond clarity and colour chart work in tandem to create a complete picture of a diamond’s value.
Why Clarity Matters
Clarity directly affects a diamond’s brilliance and fire (the way light interacts with the stone). A diamond with fewer inclusions reflects light better, creating more sparkle. However, diamonds with a high clarity grade can be significantly more expensive. For many people, diamonds with VS or SI clarity offer the best balance between price and appearance.
Clarity vs. Size and Cut
While clarity is important, other aspects of a diamond — like cut and size — also play significant roles. A well-cut diamond will exhibit more sparkle and brilliance, even if it’s not perfect in terms of clarity. On the other hand, a diamond with high clarity but a poor cut may not be as visually stunning.
How to Use the Diamond Clarity Chart
When comparing diamonds, use the diamond clarity chart as a tool to understand what you’re purchasing. Here are a few tips:
- Consider the Size of the Diamond
The smaller the diamond, the less likely inclusions will be visible to the naked eye. For diamonds under 1 carat, many buyers opt for an SI1 or VS2 clarity, as inclusions are less noticeable in smaller stones. - Think About the Setting
In many jewellery settings, such as halo or solitaire rings, the diamond’s clarity may be less noticeable due to the setting’s design or the presence of accent stones. This is particularly true for diamonds with SI or I clarity. - Balance with Colour
The diamond chart clarity is not the only factor to consider. Pairing a high-clarity diamond with an appropriate colour grade (D to Z, with D being the most colourless) creates the ideal balance for your piece. - Use the Chart to Compare Diamonds
If you’re unsure about a diamond’s clarity, ask to see it under a magnifying glass or a clarity diamond chart. If the inclusions are hard to detect with the naked eye, it might still be an excellent option despite a slightly lower clarity grade.
Diamond Clarity and Colour Chart
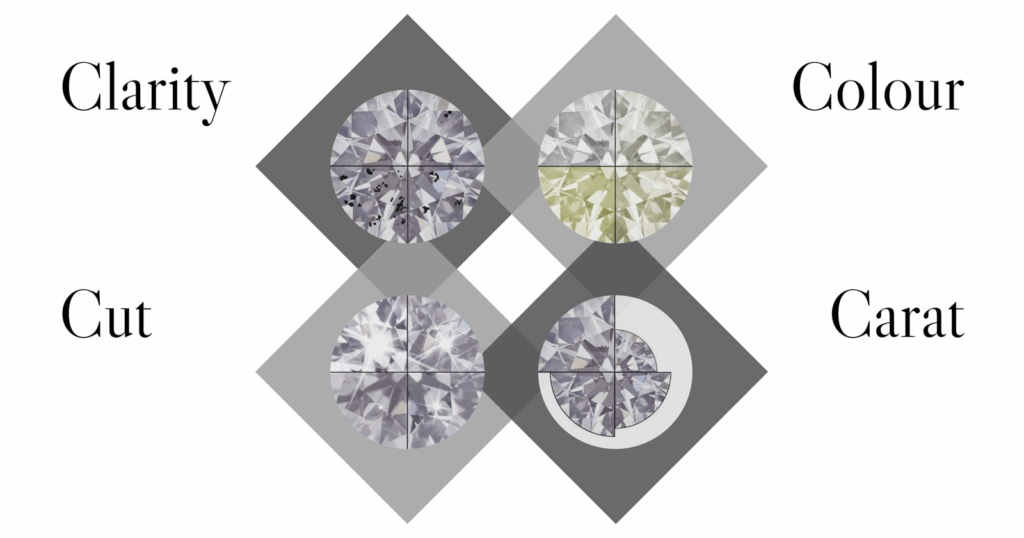
The diamond clarity and colour chart is essential when selecting a diamond. Here’s a quick overview of what to consider:
- Clarity: Ranges from Included (I1, I2, I3) to Flawless, indicating the existence of flaws.
- Colour: Ranges from D (colourless) to Z (light yellow or brown), with diamonds at the colourless end being more expensive.
- Cut: The cut of the diamond is arguably the most important factor, influencing the overall sparkle of the stone.
- Carat: The weight of the diamond, which also affects its price and size.
For example, a VS1 clarity diamond with a D colour and excellent cut will be significantly more valuable than an SI2 clarity diamond with an H colour and fair cut.
How to Choose the Right Diamond Clarity for You
Your preferences and your budget should be taken into account while choosing a diamond. Here’s how to pick the clarity that best suits your requirements:
- For Budget-Conscious Shoppers: Diamonds of SI1 or VS2 are of exceptional quality without being too expensive. These diamonds typically have small inclusions that are not visible to the naked eye.
- For Those Looking for Perfection: If you have a larger budget and want a flawless diamond, Flawless (FL) or Internally Flawless (IF) diamonds will offer maximum brilliance, though they come at a higher price point.
- For Balancing Quality and Value: Consider diamonds with VVS1 or VVS2 clarity, as they offer outstanding quality with minimal visible imperfections. These diamonds often provide a great balance between price and appearance.
The diamond clarity scale is a critical factor in understanding the quality and value of a diamond. By referring to a diamond clarity chart and considering both clarity and colour, you can make an informed decision when purchasing your diamond. Keep in mind that the diamond chart clarity is just one part of the overall equation — size, cut, and your budget also play vital roles in your selection.
Understanding the diamond clarity and colour chart and how each factor affects a diamond’s appearance and price will ensure you choose the right stone for your needs. Whether you’re looking for a diamond engagement ring, a special gift, or an investment piece, this guide will help you navigate the world of diamonds with confidence.